Saturday, October 25, 2014

Homemade Yogurt

I've been making yogurt now for about two and a half years. My wife experimented with the Specific Carbohydrate Diet a couple of years ago and we liked the lactose free yogurt methodology that it recommends. You can buy lactose free yogurt in stores, but I like the thickness and taste of the home made stuff.

SCD lactose free yogurt is "cooked" for 24 hours (regular yogurt is only left to ferment for about 4 hours). You probably need a yogurt maker to be able to control the temperature for 24 hours. An cooler or oven is not going to be convenient.

We got a Yogourmet yogurt maker and have been very happy with it. They only change that we made was that we use a glass jar instead of the plastic vessel that comes with it. We bought the jar from Lucy's Kitchen in Bellingham. We also bought a voltage dimmer in case we needed to increase or decrease the temperature of the yogurt maker because our house is on the cold side and we were concerned that the temperature might end up being a little low. The temperature turned out to be very stable and at exactly the right level (110 degrees).

We've been using the Yogourmet yogurt starter as well (since it is recommended by the SCD for lactose free yogurt), but I'm going to get some heirloom yogurt cultures from Cultures for Health soon and try them. The Bulgarian starter may be where I start.

This is how I make my yogurt.

Step 1
Make sure all your gear is washed/clean. I also pour boiling water over all my pans, jars and spoons. But I don't boil them for 5 minutes. 

Gear
Sauce pan
Metal spoon
1/2 cup metal measuring cup (plastic is fine too)
Thermometer
Fermenting jar with lid

Step 2
Bring your milk up to temperature. If you are using raw milk, you need to bring it up to 180 degrees and then bring it down to 110 degrees. If you are using pasturized milk, you can just bring it up to 110 degrees and you're done. I use goat milk, but I've used homogenized cow milk and had the same good results. Stir the milk while you heat it. 

Tip
I pull the milk off the burner at about 106 degrees. The pan continues to transmit heat and the temperature will climb. Experiment and find out what works for your pan and range. Cooling the milk off takes time. I use a large bowl with ice water in it for cooling down 180 degree milk (and I stir it).

Step 3
Put your yogurt starter in your fermentation vessel. Then pour a couple of cups of 110 degree milk into your vessel and stir it to mix the milk and starter. Then pour the rest of the milk into your vessel and put on the lid.

Step 4
Put your vessel into your yogurt maker. Make sure to follow the maker's instructions. The Yogourmet maker requires warm water to fill the void between the fermentation vessel/jar and the maker container. The water level ends up being about the same as the milk in the jar.

Step 5
Plug in the yogurt maker and let it sit for 24 hours.

Step 6
The fermented milk will likely be a little runny. More like kefir. You can make it thicker by adding milk solids to the milk before "cooking" it. But the Yogourmet maker comes with a cheese cloth bag and that's what I use to thicken up the yogurt. I pour the yogurt into the bag and hang the bag above a bowl for about 12 hours to strain off the whey.

Tip
I use the whey to bake with. I usually make muffins and bread with it. 


Step 7
After 12 hours or so I empty the bag of yogurt into a container. I also scrape all the yogurt off of and out of the bag. I try not to waste any. It's very thick at this point... pretty much Greek yogurt. If you like your yogurt thinner, strain it for less time. Or stir a little whey back in.


Tip
Straining the whey off for about 12 hours pulls about half of the volume of the yogurt out as whey. I start out with 64 fluid ounces of yogurt and end up with about 32 ounces of thick yogurt and 32 ounces of whey. Different cheese cloths will likely result in different results.

Update
I have been looking into using heirloom cultures and have learned that the 24 hour culturing time stresses the bacteria to the point that the resulting yogurt can't really be used as a starter for a new batch of yogurt. CulturesForHealth.com has a good page about this. They suggest keeping a mother batch of yogurt to use as a starter for the 24 batches. 

Wednesday, August 6, 2014

Raspberry Infusion

I just remembered that I started a raspberry in rum infusion. I had intended to let the infusion sit for about two weeks, but I forgot and it ended up sitting for about six weeks. All I did was put raspberries in rum. I didn't add any sugar (which is often part of infusion recipes).

The rum had a wonderful raspberry aroma and a mellow raspberry flavor. I made about 3 ounces and used half to make my champagne mojito recipe. It was really quite good. The raspberry and mint were very complimentary.

This is my second attempt at infusing. My first attempt was with mint in rum. That didn't turn out very well. The mint turned dark and the rum tasted off. Fresh mint is definitely better. And while I grow my own mint, I have started buying some at Trader Joe's and have been impressed with the quality.

Friday, June 6, 2014

The Taste of Water After an Artichoke

I love to eat artichokes. And I especially love drinking a glass of water after I eat an artichoke. I don't seem to run into many people who are aware of or can perceive the sweetness that artichokes imbue to water and other foods.

Here's a blog post from SaltySourBitterSweet.com that talks a bit about the phenomenon of the sweetness that follows the eating of an artichoke.

There are two chemicals that bring on this effect, cynarin and chlorogenic acid.

Another article that has some history of the artichoke that is an interesting read is here.

I know this post has nothing to do with pickling or booze. Except that wine doesn't taste any better after eating an artichoke. And pickled artichokes loose the sweetness imbuing ability.

Monday, December 30, 2013

Fermenting Beets


This is my second batch of fermented beets and carrots with cloves and mustard seed. The first experimental batch turned out really well. The beets were firm and crunchy but soft enough to eat easily. And they were sweet (along with the tangy sour from the fermentation)! I'm really looking forward to the next batch. The first batch was so good that I've been sipping the brine! (It's supposed to be good for your liver - see kvass.)

Ingredients
Enough beets and carrots to fill a 32 ounce jar (about 3 medium beets and 3 carrots)
2 teaspoons of whole cloves
1 teaspoon of whole mustard seed (yellow or brown)
2 cups brine (2 cups water, 4 teaspoons sea salt)
(You could also add some cinnamon stick. I'll try that on the next batch.)
1 cabbage leaf

Directions
1.  Add the cloves and mustard seed to the jar.
2.  Cut up the beets and carrots (about 1/8" to 1/4" thick). You can leave the skins on or peel them off. It's up to you. I left them on for this batch. I peeled the first batch I made.
3.  Add the beets and carrots to the jar. Pack the jar tight to reduce empty space.
4.  Add the brine all the way to the top. Try to agitate the jar to get all the air bubbles out.
5.  Fold the cabbage leaf and stuff it into the top of the jar to keep all the beets and carrots under the surface of the brine.
6.  Put the lid on the jar (not too tight). Put the jar in a casserole dish and put somewhere out of the way (like the top of your fridge). Give it about a week (though it could take as little as four days or as long as two weeks depending on the temperature in your home). Taste a beet or carrot every day to check for "doneness" (that's up to you - I like my ferments nice and sour).
7.  When you're happy with your fermentation, toss the cabbage leaf in the compost and put the jar in the fridge.
Enjoy!

Saturday, August 31, 2013

Watermelon Juice Margarita

I recently juiced a watermelon. I got three quarts of juice (it's such a beautiful color!). My four-year-old would have liked to drink an entire quart. My spouse made popsicles with one quart (the juice was for her), but she said I could use some of it how ever I wished.

A friend had told me about how he likes to make frozen watermelon margaritas a few years ago. I've tried making them a couple of times but have never really been impressed. I thought I might give it another try now that I had so much watermelon juice. But I thought I would leave out the frozen part.

I ran across this margarita recipe on The Kitchn blog, and I really enjoy it! I'll often leave out the cold water that the recipe calls for and just add a little more ice and shake the drink a little longer for more melt (and a colder drink).

The first watermelon juice margarita I made: 2 oz tequila, 2 oz watermelon juice, .75 oz lime juice, .5 oz agave nectar, ice. This was a good drink. Sweet like many margaritas, but with a subtle watermelon flavor.

Watermelon Juice Margarita (#2)
2 oz tequila
4 oz watermelon juice
1 oz lime juice
ice

This was a very light margarita experience. It wasn't really sweet (I like that there wasn't any added sweetener), the watermelon flavor was more forward, the lime and tequila were both very evident and balanced, too. I would drink this again.

UPDATE: I've tried adding between a half-tablespoon and a tablespoon of agave nectar to the #2 recipe and really enjoyed the results. And I shake the margarita to mix it as opposed to stirring it.

UPDATE 2017-05-28: Here are some additional notes on the #2 recipe. I put the watermelon in the blender now. And I use 2 tsps of agave nectar as noted in the above update. The blended watermelon is not a sweet as the watermelon juice (thus the agave nectar), but it is still very good.

Tuesday, August 27, 2013

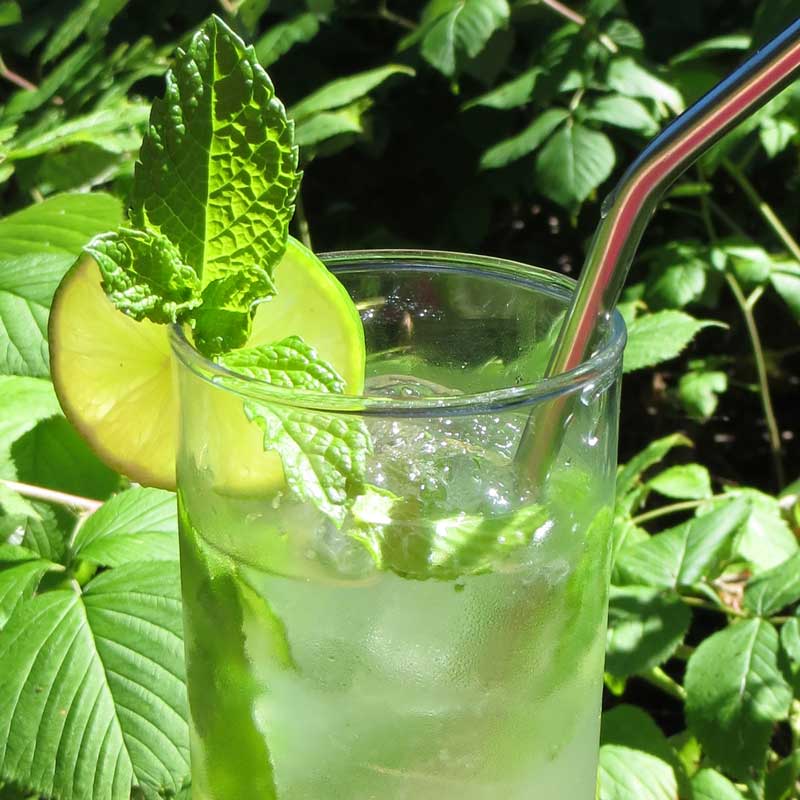
My Grown Up Mojito

I began making mojitos as my go to summer drink a few years ago. I worked on my proportions over the course of three summers and was very pleased with what I'd arrived at.

Mojito Spritzer
1/3 cup white rum
1 cup carbonated water (I use San Pellegrino)
8-12 spearmint leaves
1 Tbsp fresh lime juice
2 Tbsps syrup (1 part white sugar, 1 part water)
3-4 ice cubes
Pour the rum in a pint glass. Put in the mint leaves. Gently muddle the leaves. Add the carbonated water, lime juice, syrup and ice. Gently stir the drink.

Muddling Note: Use a nice muddler. Mine is made of cherry wood and has a long handle. I oil it to seal it regularly. Be gentle with the mint. Press and maybe make a small rocking motion... or maybe a small twist. You're not trying to blend the mint. You're trying to release the oils. If you don't have a muddler, you can try using the handle of a wooden spoon.

Turns out that this was a gateway recipe. It was sweet, light, and very drinkable. But to be honest, it was like a soda and while it was ultimately a good thirst quencher, it lacked enough depth to keep me from wandering. Or perhaps my palate matured (or at least changed).

About a year ago, I ran across this recipe for the style of mojito that Ernst Hemingway drank. While I liked this recipe, I noticed a couple of things that I didn't care for as much. I didn't like the way that the brown sugar muted the spearmint. I've grown used to the minty brightness of my first recipe, and I've experimented with brown sugar (and even honey) before and dismissed it as too much extra competing flavor. I also didn't like the dominance the Champagne had in the drink. It overpowered what I've come to consider the primary experience of a mojito: bright spearmint, background lime, and a rum foundation. That being said, I still liked the character and complexity that the Champagne contributed.

I had recently read a recipe for a Champagne Mint Julep that used a sparkling moscato wine and it struck me that I might be able to substitute it for the Champagne in the mojito and maybe even leave out the sugar entirely! After some experimentation, I realized that there is a lot of variation in sparkling moscato wines. Many of them are VERY sweet and have a very heavy grape flavor. This is to be expected since the muscat grape is a table grape and what you're getting is grape juice wine.

I ran into a good mojito candidate when I tried Barefoot Bubbly Moscato Spumante wine. It's not overly sweet and doesn't have a heavy grape flavor. This is now my favorite way to drink mojitos!


My Champagne Mojito
8+ fresh spearmint leaves
1 Tbsp lime juice
1.5 oz white rum
3 oz moscato sparkling wine (Barefoot Bubbly Moscato Spumante)
3-4 ice cubes

I'm going to continue to play with the proportions, but I'm pretty happy with it right now. It's a really simple recipe, and it has all the qualities that I look for in a mojito. The biggest change is that's it's not very sweet. I've made it for some friends and one said that it struck him as a "grown up" drink. And they've all really enjoyed the recipe!

I've tried Barefoot's sparkling Red Moscato and found it to work very well with this recipe as well.

Sunday, August 25, 2013

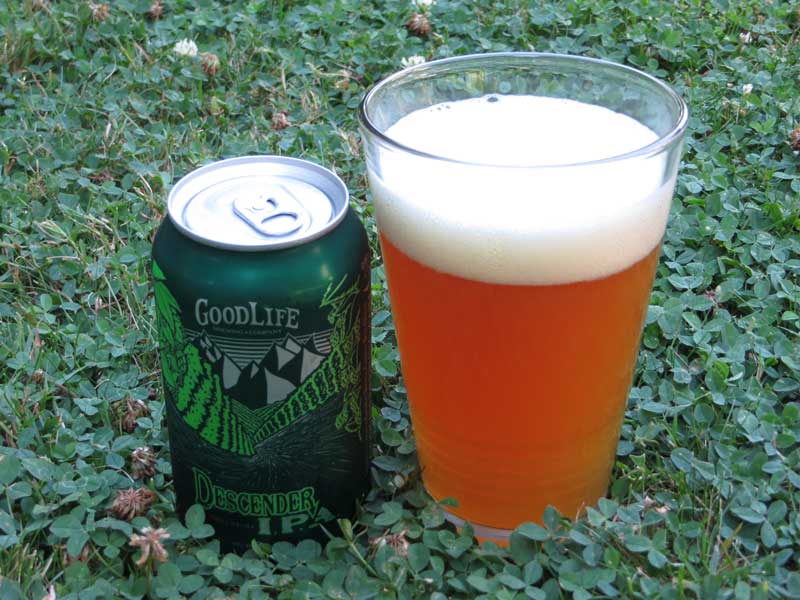
GoodLife Descender IPA


I ran into GoodLife's Descender IPA on tap at Ellensburg Pasta Company a few weeks ago and really enjoyed it. It's just about as good in the can. Compared to many NW IPA's, it's not overly hoppy. The flavor is nicely balanced and has distinct tones of citrus. I'll definitely be drinking this beer again!