Friday, November 12, 2021

Caraway Carrots

I began making sauerkraut regularly in 2015. It turned out to be one of the foods my then three year old son would eat consistently. He still eats it occasionally now that he is nine years old. He really likes the caraway flavor and the salty tang. 

I have also been fermenting various vegetables since 2013. Carrots have always been an easy vegetable to ferment so that I could taste the seasonings clearly since carrots are generally very neutral in flavor. Since my 3yo liked my sauerkraut, I decided to try fermenting carrots using caraway seeds as the seasoning. He LOVED them! In fact, he still loves them. I always have a batch on top of the fridge fermenting, and he almost always eats some at diner.

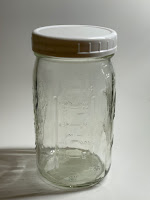
Here is a jar of caraway carrots that has been sitting on top of the fridge for 12 days. You can see some of the dried out salt foam on top of the lid. You can see the arrangement in this 32 ounce wide mouth mason jar: the caraway seeds on the bottom, the carrots, the cabbage, the glass weight, and the fermenting lid. There is also about 2 cups of brine in the jar. 

Maybe I should post the recipe so that he can make them for himself when he's off at college in the future.

EQUIPMENT

I used to use mayonnaise jars to ferment in. They are a good size and have plastic lids. I used a very small glass jar as the weight (I'd fill it with brine and screw on its plastic lid). I've read that you can easily use a small zip-lock bag full of brine as a weight as well.

Now I use 32 ounce wide mouth mason jars. I have plastic lids for when I put the jars in the fridge. I also use glass weights and fermenting lids. The lids that I use are from Nourished Essentials.

RECIPE

Carrots (organic), 2 bunches is usually enough

Brine, 2 cups (2 teaspoons sea salt per cup of water, water should not have chlorine in it)

Caraway seeds, 1 to 2 tablespoons

Cabbage leaf  (organic)

STEPS

1. Wash the carrots and cut them into rounds or sticks.

2. Place the caraway seeds in the bottom of the jar.

3. Place the carrots on top of the caraway seeds.

4. Fold the cabbage leaf into the jar on top of the carrots. The cabbage is both a plug to keep the carrots below the brine surface as well as a source of bacteria to speed up the fermenting. The carrots have bacteria on them as well, but they've been washed pretty well so the count is low.

5. Place the weight on top of the cabbage.

6. Pour the brine into the jar.

7. Screw on the lid.

I usually screw the lid on tight at this point and gently tip the jar in a circular motion to get any air bubbles to come to the top. Then I open the jar and add a little more brine. After the air is out of the jar, I screw the fermenting lid back on tightly and place the jar on top of my fridge where it is out of the way. I place the jar on a plate or in a casserole dish so that brine doesn't pool on top of my fridge. 

If you don't have a fermenting lid, you can just screw on a regular plastic lid and leave it loose so air can escape. When the lid is just loosely on the jar, you will lose more brine to evaporation so you need to check the brine level more often. Make sure the veggies are submerged below the brine surface.

8. Let the carrots ferment for about 14 days. I check every now and then to make sure there is enough brine in the jar. If the level is too low, add some more brine.

9. Place the jar in the fridge for a week. You can leave the fermenting lid on or swap it out for a regular plastic lid at this point.

10. The carrots are ready to eat after 3 weeks.  Remove the glass weight. Remove the cabbage cap. I usually add some brine into the jar to take the place of the cabbage and weight so that the carrots stay submerged.

This is the flavor profile that my son prefers. You could start eating them after two weeks. 

Enjoy!

Saturday, April 11, 2020

Starter

The coronavirus stay-at-home strategy is in full force here in the Seattle area. A lot of people in my area did some panic buying a few weeks ago. I didn't do any panic buying. I also assumed that the panic buying was mostly for TP, pasta, beans, and rice. That was a bad assumption. All the flour and yeast are gone from the stores. You can't even find yeast online.

Time to make my own starter!

I've always known that making a starter was pretty easy. I read some stuff online and watched some videos. Then I got a one quart mason jar, added 3 tablespoons of brown rice flour, and 2 tablespoons of distilled water. I had soaked some raisins in the water for five minutes to recruit some additional yeast for my starter. I think some additional sugar from the raisins also made it into the water. I stirred it up, put a lid on the jar very loosely, and put the jar on top of the fridge.

I added 3 tablespoons of rice flour and 2 tablespoons of distilled water each day. I also stirred the starter a couple of times a day.

The starter looked and smelled like it should... very yeasty. One of the keys to making sure the starter ferments well is to use distilled water or highly filtered water. The chlorine and other additives to city water apparently inhibit yeast growth.

The bread that I made with the starter turned out very well. It took a lot longer to rise than bread I've made with store bought yeast. I let the dough rise for about eight hours. I usually only need 20-30 minutes of rise time when I use store bought yeast. I used a ratio for the starter in the bread recipe called the 1-2-3 weight ratio: one part starter, two parts liquid, and three parts flour by weight.

The bubbles in the bread are evenly distributed, and the bread isn't weak or crumbly. This is often the case when I use store bought yeast. The bread also has a much more noticeable sour flavor. It is not as strong as a sourdough bread, but it is definitely tangy.

Thursday, August 17, 2017

Cole Slaw

I made cole slaw! It was pretty good!
I found the recipe here, but I used green cabbage instead of purple. I also used rice milk and vinegar instead of buttermilk.

Friday, January 13, 2017

Sauerkraut

I stopped making sauerkraut over the summer because of house construction. At first I thought my family would be moving out of our house, but then that didn't happen. Then I decided with all the distractions of the construction project, that I just wouldn't do sauerkraut as well.

I started my first batch since March in November. I did my standard recipe.

5 pounds cabbage (shredded on a mandoline)
1 apple
2 tsp sea salt per pound of cabbage/apple
2 tsp caraway seeds
4 weeks fermentation time

I gave some of the harvested sauerkraut away as xmas presents. Then I started another batch of kraut just before xmas. I took some of the fresh kraut and started two small batches in which I added some ground red chile. I tasted the brine and it was delicious! I harvested one jar three weeks later and the spice level of the sauerkraut was negligible, but the flavor was pretty good. If I want more spice, I'll either have to add more at the beginning or use a different/ hotter spice.

Wednesday, January 4, 2017

Gin Infusion: No. 2

This is my second attempt at a gin infusion. The first one had way too much cardamom for my taste. This second batch has half the cardamom, uses twice the orange peel, and replaces the licorice with fennel. I liked the result a lot more. It's not like the gin you get from the store. It's a lot more aromatic.

Saturday, December 17, 2016

Fermented Brussel Sprouts

It's Brussel sprout season so I fermented some with some carrots and caraway seeds. I was hoping that they'd taste like sauerkraut. They were very bubbly during their time on top of the fridge and they were pretty powerful in their odor (Jordan thought they were quite foul), but they didn't taste like sauerkraut. They were pretty good though. I ate them all up.

Licorice Carrots

I had some licorice root left over from the gin infusion that I made so I added some to a batch of fermented carrots. They turned out to be delicious! (But I'm partial to licorice.)